
Flow Map on Terrains
We previously looked at the terrain generator script we used in midterm projects with first-year architecture students over here. Later on, we added a few analysis modules to this tool. You might remember the slope analysis tool from this link. Today’s topic is another type of analysis: flow. The idea for this code wasn’t actually mine; I developed it by looking at an existing script based on Serkan Uysal’s suggestion. Unfortunately, I don’t know who originally wrote it. Keeping track of these things can be tough sometimes. At the end of the day, I guess designcoding scripts circulate all around the world in various modified versions.

What this code does is drop points onto a terrain and trace them downhill following the slope. For example, it can be used to identify paths and collection basins where rainwater flows. In our student project, this analysis helped students better understand the site’s topography and make design decisions accordingly. The algorithm is quite simple. If I remember correctly, the original version used Anemone to create a loop. I handled this looping part inside a Grasshopper Python component, instead. After points are scattered onto the terrain, the code goes through these steps sequentially: To make the points (droplets) flow across the surface, a closest-point calculation is repeated at every step of the loop. The code moves the points down along the Z-axis by a certain amount (step_size) and then uses the brep.ClosestPoint method to find the closest projection of this point on the surface. When the surface is sloped, the closest point on the surface to that lowered point ends up shifted sideways (simulating the effect of gravity and the surface curvature). Because the point is pulled back to the closest position on the surface at every step, the “droplet” seems to follow a path as if it were sliding down a physical surface. The simulation for that droplet ends when the point can no longer move by a distance threshold (< 0.001) or falls outside the surface boundaries.

import Rhino.Geometry as rg
import ghpythonlib.treehelpers as th
def rain(points, target, i, step_size, reset_trigger):
	if not reset_trigger: return []
	all_paths = []
	for point in points:
		cp_start = target.ClosestPoint(point, 0.0)
		if not cp_start[0]: continue
		curr_p = cp_start[1]
		path = [curr_p]
		for _ in range(i):
			moved_p = rg.Point3d(curr_p.X, curr_p.Y, curr_p.Z - step_size)
			cp_close = target.ClosestPoint(moved_p, 0.0)
			if not cp_close[0] or cp_close[1].DistanceTo(curr_p) < 0.0001: break
			next_p = cp_close[1]
			path.append(next_p)
			curr_p = next_p
		if len(path) > 1: all_paths.append(path)
	return th.list_to_tree(all_paths)
path = rain(pts, target_brep, steps, step_size, reset)
In this script, I wanted the output to be a properly organized data tree instead of curves. That’s why I used the treehelpers module for the first time. You can learn more about this module here. The method I used, list_to_tree(), automatically converts nested Python lists into a Grasshopper data trees. It’s quite handy. Using the point lists coming out of the code as a tree structure, you can plug them into a polyline or curve component.

The biggest issue with this code is its high potential to freeze your computer. If you aren’t careful, you might end up calculating a massive number of points. If you set the steps too high or the step_size too small in the inputs, it will run too many operations, which can cause your computer to freeze and struggle. Because of this, I added a Reset button. If you turn this off before manually changing the input parameters (and save the document), it will help solve the freezing issue. Actually, this problem could have been fundamentally fixed by making the inputs proportional rather than metric.

Cite this post
Related Posts
Differential Growth
June 16, 2025
Differential growth is a process where different parts of a structure grow at different rates, leading to complex forms. After watching this, I decided to try it in Grasshopper. Here, differential growth mimics this behavior by applying rules such as Repulsion to avoid crowding or overlapping, Cohesion to keep parts connected or within a range, and Insertion to add new elements when a part stretches too far. The algorithm I present here simulates a differential growth process starting from a…
Curvature Map on Terrains
September 17, 2026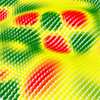
This is the last of the site analysis tools we previously used in the midterm project of first-year architecture education. As you may recall, we previously introduced a tool that generates topographies based on specific parameters. Afterward, we examined two tools that perform slope and flow analyses on these topographies. Today, we are presenting a tool that analyzes curvature. This topic actually constitutes one of the interesting intersection points between architectural design and differential geometry. Curvature is not something architects…
Wandering Simulator
March 9, 2024
In 1986, Craig Reynolds developed an algorithm aiming to model the flocking behavior of birds, which remains a cult method used in flock simulations today. In my initial study, the bird-oids (boids) have no rules or limitations, just chilling randomly on the screen. I call this initial version Wandering Simulator. There are several reasons why this fundamental simulation is difficult in Grasshopper and Python, our parametric design interface. In Grasshopper (data flow modeling), pushing the back doors a bit is…
Spacebound
September 24, 2026
Let’s take a closer look at the midterm jury assignment for our “Field & Matter”- themed Computation-based Basic Design 2 studio, which I conducted last year alongside Serkan Uysal, İpek Kuran, and Sinan Logie. I shared the studio’s final project, Earthbound, in a previous post. In this post, we will focus on our process-oriented midterm project named Spacebound. Topography as a Data Field In this first major phase of the “Field & Matter” studio, we examined how moving and stationary…
Slope Map on Terrains
August 18, 2026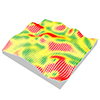
I previously shared the Grasshopper definition for terrain generation that we used in last year’s studio midterm. One of the goals of this project was to take the first step toward developing students’ skills in understanding, processing, and utilizing terrain data as a design input. To support this objective, we provided them with small supplementary tools. One of these tools was the slope map. As you can see, this is quite a simple Grasshopper definition. It computes the slope of…