
Robotic Knit Printing
My graduate student, Pınar Kahya, and I have begun experiments on material and robotic printing of mycelium-based composites. We are running tests to understand the knit-patterned alternating print, which is very common in robotic 3D printing, and to determine its parameters. We are trying to determine the optimal pattern by integrating material properties, geometry, and printing conditions. Therefore, we need a lot of trial and error. To this end, we created a Grasshopper code. Later on, we switched to a different print mode, but it was still worth testing this knit pattern anyway.
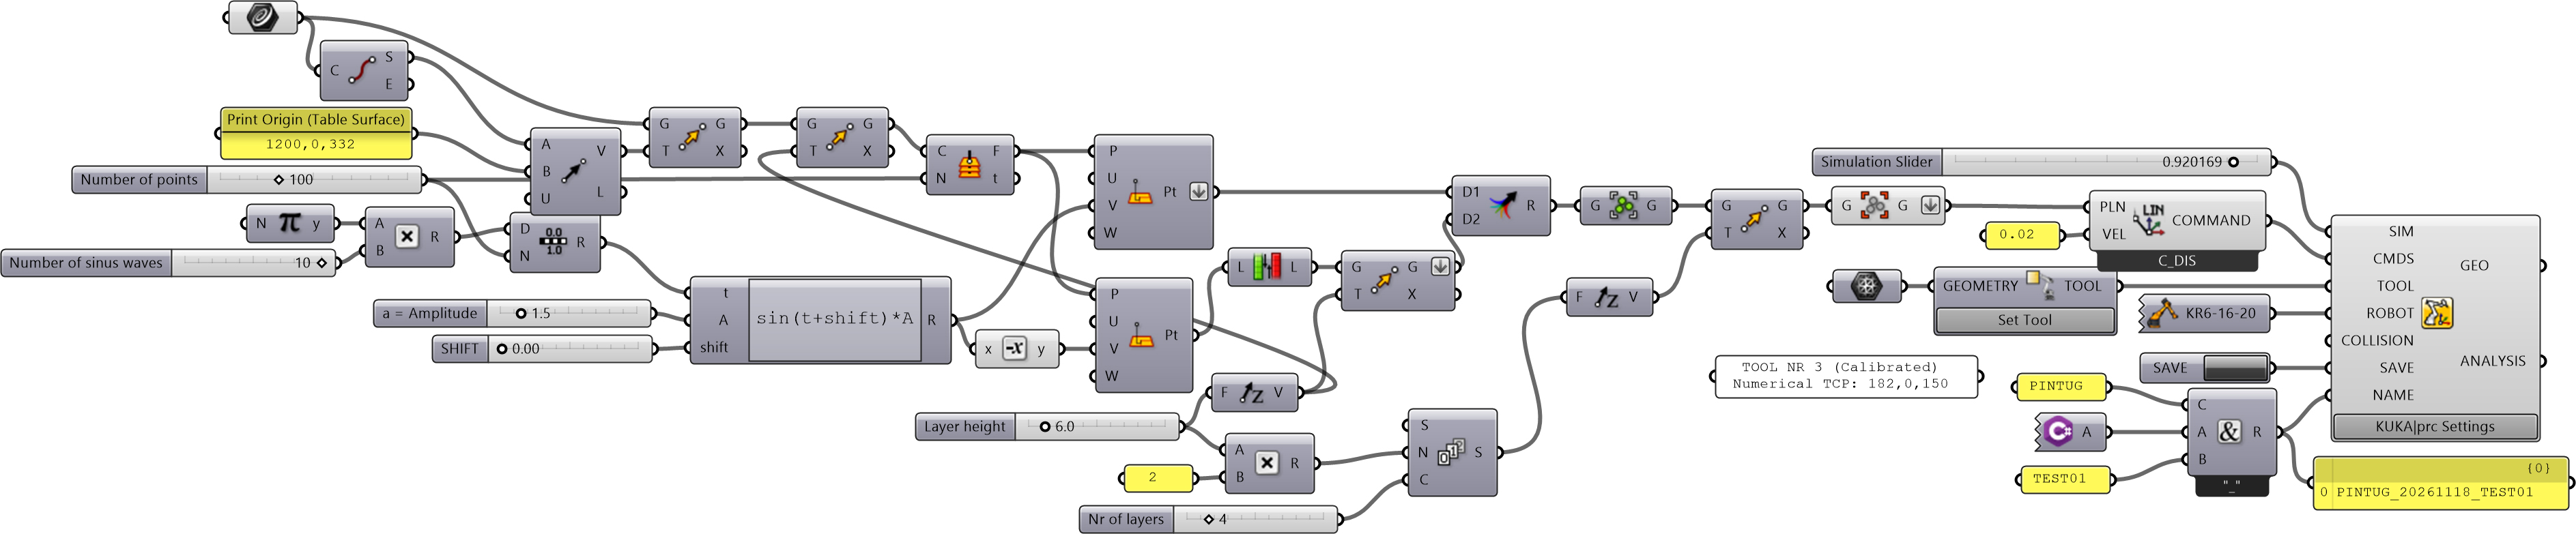
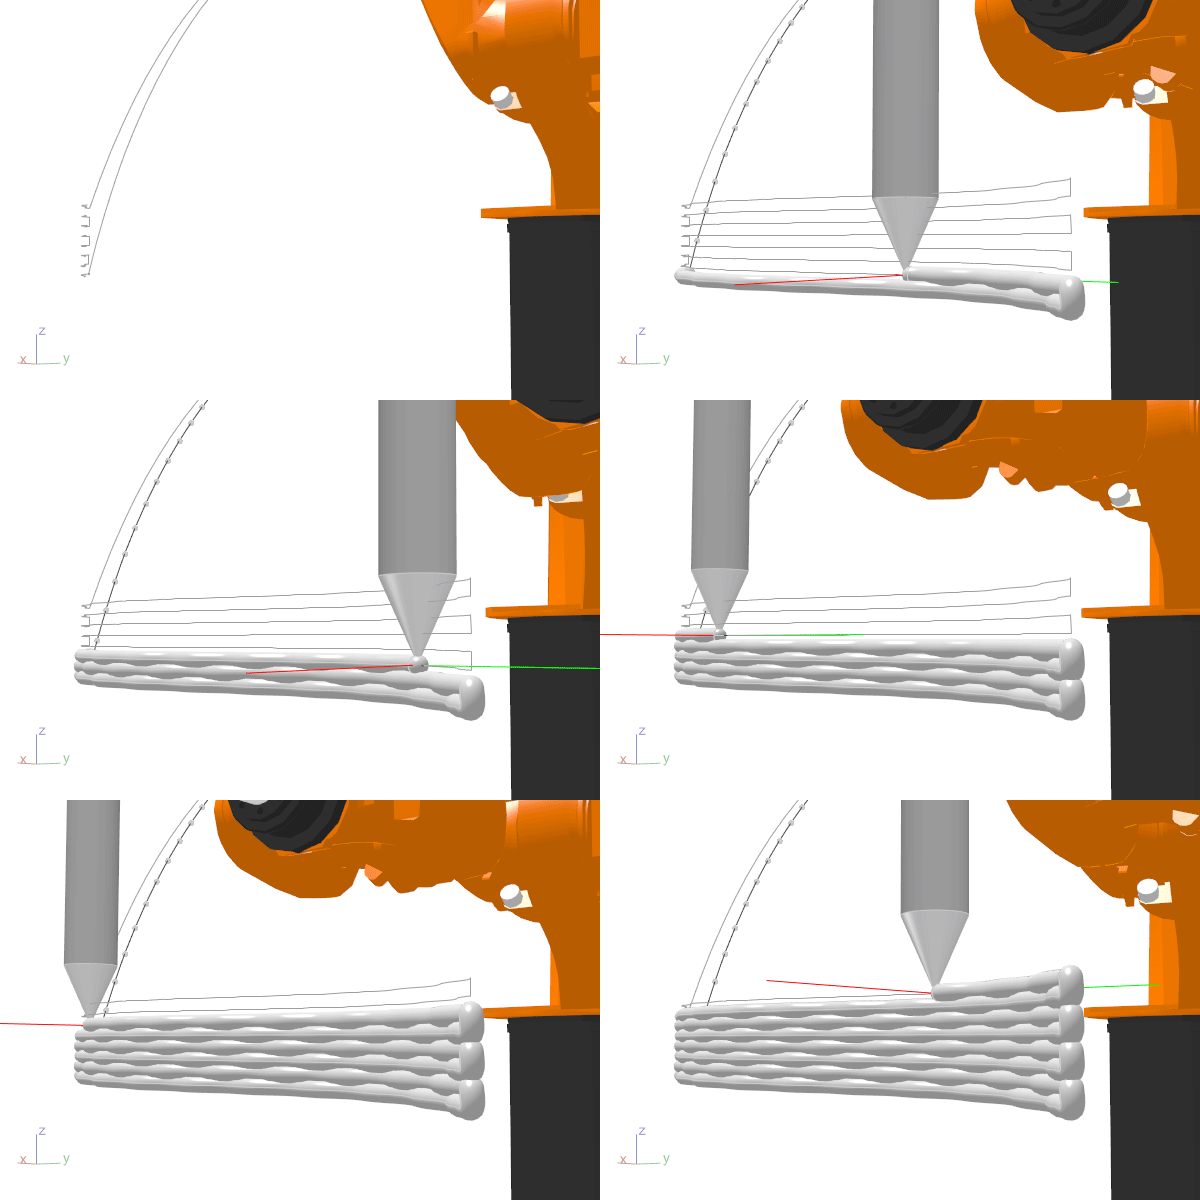
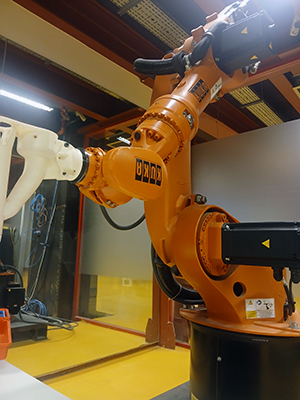
The extruder we use is a small yet capable device gifted to our lab by Doruk Yıldırım. Rather than material recipes, I am more interested in geometry and robot path design. In essence, this code wraps a sine graph onto any given curve. To achieve this, some parameters of the robot and the tool calibration must be completed. On the geometric side, after tangent planes are arrayed along the curve using Horizontal Frames, a sine function is executed on the +Y and -Y axes of each plane. Here, we used the shift and amplitude inputs from an example Pınar found online. Afterward, a series is created. The second sine curve in the -Y direction is reversed with the help of the Reverse List component. This makes it possible to continue seamlessly from the upper row in prints like walls. However, if a periodic path, such as a circle, is to be created, the Reverse List component needs to be bypassed. Ultimately, all points are generated using the given layer height and layer count. A representative view of the output is created with the Pipe component, and the corresponding robot code is generated and saved using Kuka PRC. To reiterate, the calibration of the tool must be done both on the robot and in Kuka PRC. As you can see, in small-scale print jobs like this, having the robot invert its wrist and extend its arm downwards in this manner brings many conveniences. I use this holding posture because the tool is a delicate device prone to tipping over. The axis values (Home position) I use here are A1=0, A2=-90, A3=140, A4=-180, A5=50, and A6=180.
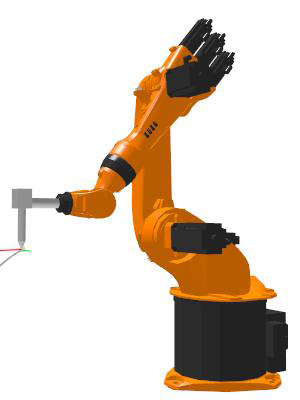
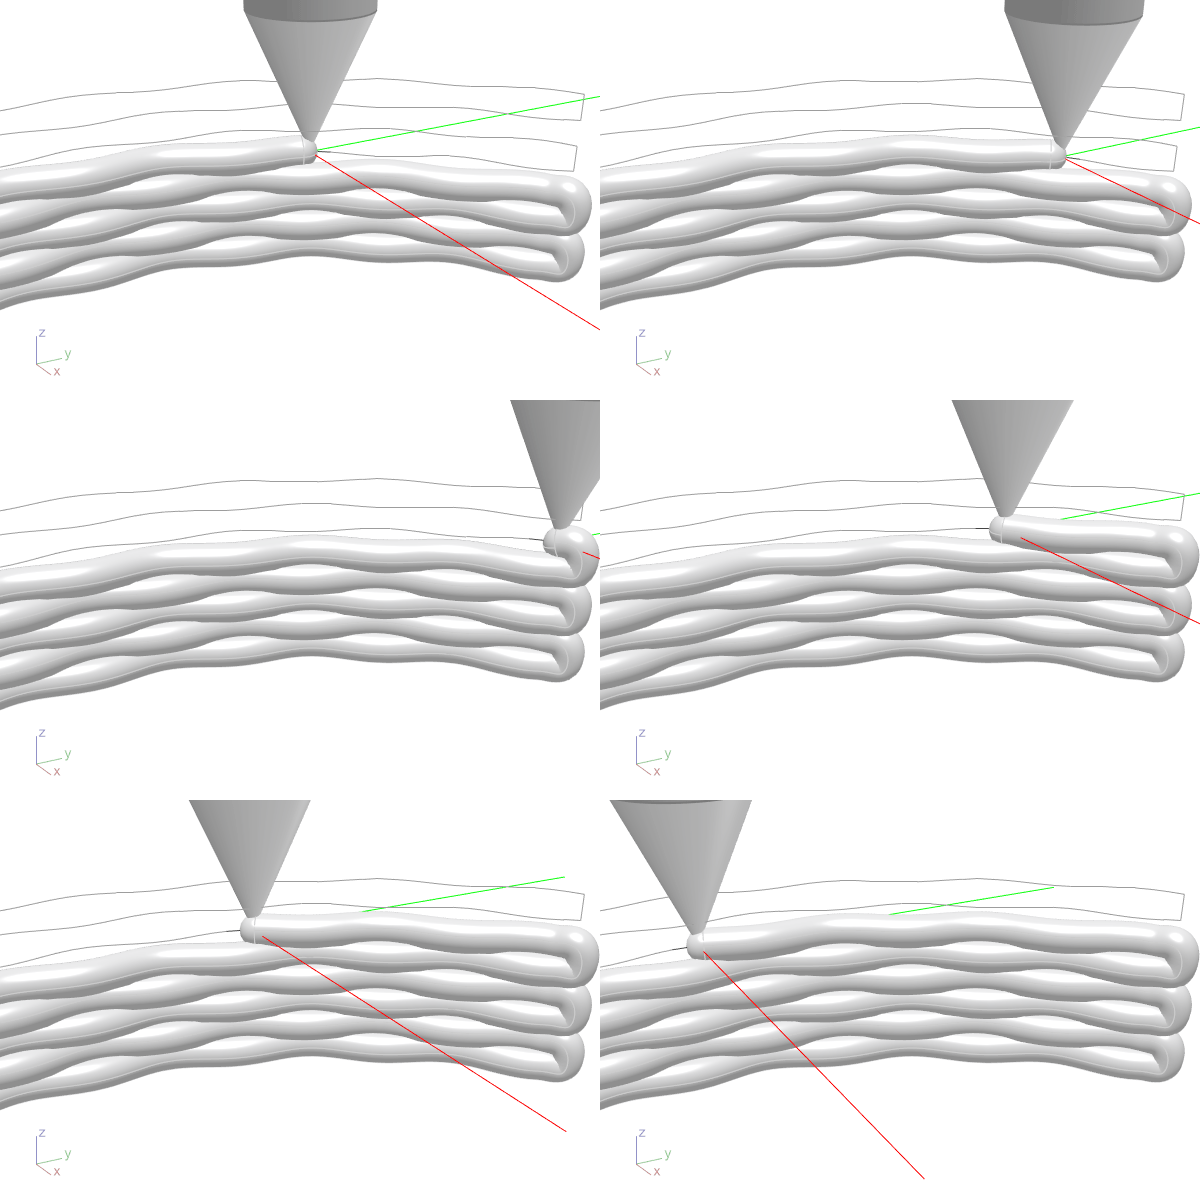
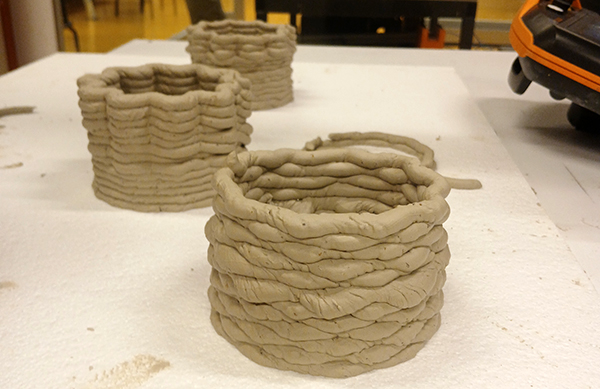
The nice thing here was the patterns that emerged beyond the printing parameters. The initial print trials were not very successful because we had to experiment to simultaneously adjust the robot speed, compressor pressure, and extruder speed to achieve a consistent print. In this type of printing, rather than the material strength, we care about the wall thickness and the small cavities it creates. Our printing studies will continue to understand how living materials like mycelium will behave in these cavities. Below is the Grasshopper code we developed. Kuka-PRC is necessary to run it.
Cite this post
Related Posts
Robotic Path Planning for Concrete Printing
August 19, 2026
Three-dimensional concrete printing (3DCP) is an innovative digital fabrication and automation technique based on additive manufacturing that enables the creation of complex and customized structures in the architecture and construction industry. Its most notable advantages include eliminating formwork costs and labor (Buswell et al., 2020; Lyu et al., 2021; Kaliyavaradhan et al., 2022) and facilitating the fabrication of structural elements with complex curvatures, particularly in printing systems utilizing industrial robotic arms (Alabbasi et al., 2023; De Soto et al., 2018)….
RHWC of Convex Polyhedra
September 12, 2026
Hot-wire cutting (HWC) is a cost-effective subtractive fabrication technique used across many industries. The basic idea of HWC is to cut a block of material by melting it with a resistance-heated wire under tension. It is effective for materials with low melting temperatures, such as expanded polystyrene (EPS) and extruded polystyrene (XPS). Generally, HWC is associated with mold production in the architecture, engineering, and construction (AEC) industries. Robotic hot-wire cutting (RHWC) is a subtopic of HWC. In a standard RHWC…
Robotic Sandblasting Continued
August 17, 2026
We continued the previous week’s experiments with Efecan. Using the sandblasting tool, we started performing point and line tests. The Grasshopper script I developed for this process is below. It allows us to move the gun along defined paths or execute target shots at specific points. To mount the IBIX pressurized gun onto the Kuka KR-20 model robot, I 3D-printed a custom adapter using PETG. Although it required a bit of force, the gun fits tightly into the adapter; it…
Cycloidal Toolpath Planning for Robotic Sandblasting
August 5, 2026
Today, Efecan and I attached the sandblasting device to the robotic arm. The device sprays a special sandblasting material onto surfaces using air pressure. Thus, it is used for cleaning moldy and dirty surfaces in buildings under restoration. Under normal conditions, the sandblasting gun is controlled manually. If the cleaning is too light, it remains insufficient, but it shouldn’t be so intense as to erode the stone either. Normally, the operator performs this control visually. Here, the potential uses for…
Robotic Hotwire Cutting Polyhedra
December 20, 2018
Today, we have studied creating complex robot programs manually again. Platonic solids were the subject of this study. Students tried to create a sequence of robot moves that produces a Platonic solid out of a 17cm EPS cube. We simply call this the robotic hotwire cutting polyhedra exercise. However, the size of our hotwire cutter became one of the problems because of its risk of crashing. We crashed several times but managed to cut some polyhedra at the end of…