
Basics of Robot Programming
Today, we started learning Robots add-on for Grasshopper. The first two codes we experimented with were similar to the first week’s jogging exercises. In the first one called “axial jogging”, we had 6 number sliders to control the angles of the axes. Every number slider generates values between -Pi and +Pi. These numbers are joined into a text by adding a comma in between. Then, Create program and Simulate Program components of the Robots plug-in are used to convert this information into a robot pose.
This kind of input is mostly used in sending the robot to a home position, where the angles of the axes are needed regardless of what tool is mounted. In the second exercise, we experimented with plane inputs and used the GetPlane component of the Robots add-on. This component takes X, Y, Z coordinates and A, B, and C rotation angles to define a plane. When connected to the program, the robot will follow this plane.
The Robots add-on is free to use and can be downloaded here. We are using the Fifth edition. The add-on is installed by putting gha and DLL files into the Components Folder of Grasshopper. The files for our KR-20 robot are also in the website (called Bigli). These files should go into a folder named Robots inside of your Documents folder (in Windows). Important Update: Unfortunately, Robots add-on does not work with our robot anymore and gives error messages as of 2026.
Cite this post
Related Posts
Tool Calibration in Robots
October 11, 2018
On the second day of the Digital Fabrication course, we tried to understand what is a “tool” and how to draw/ produce/ attach/calibrate a simple penholder tool for our robot. This study will hopefully make students aware of the effects of these procedures in robotic design and fabrication. The tool we used here is based on this Rhino drawing laser-cut from a waste plexiglass sheet. The flange of our robot has a diameter of 50mm and has 8 holes for screws with a…
RHWC of Convex Polyhedra
September 12, 2026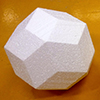
Hot-wire cutting (HWC) is a cost-effective subtractive fabrication technique used across many industries. The basic idea of HWC is to cut a block of material by melting it with a resistance-heated wire under tension. It is effective for materials with low melting temperatures, such as expanded polystyrene (EPS) and extruded polystyrene (XPS). Generally, HWC is associated with mold production in the architecture, engineering, and construction (AEC) industries. Robotic hot-wire cutting (RHWC) is a subtopic of HWC. In a standard RHWC…
Robotic Path Planning for Concrete Printing
August 19, 2026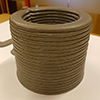
Three-dimensional concrete printing (3DCP) is an innovative digital fabrication and automation technique based on additive manufacturing that enables the creation of complex and customized structures in the architecture and construction industry. Its most notable advantages include eliminating formwork costs and labor (Buswell et al., 2020; Lyu et al., 2021; Kaliyavaradhan et al., 2022) and facilitating the fabrication of structural elements with complex curvatures, particularly in printing systems utilizing industrial robotic arms (Alabbasi et al., 2023; De Soto et al., 2018)….
Robotic Sandblasting Continued
August 17, 2026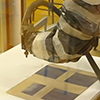
We continued the previous week’s experiments with Efecan. Using the sandblasting tool, we started performing point and line tests. The Grasshopper script I developed for this process is below. It allows us to move the gun along defined paths or execute target shots at specific points. To mount the IBIX pressurized gun onto the Kuka KR-20 model robot, I 3D-printed a custom adapter using PETG. Although it required a bit of force, the gun fits tightly into the adapter; it…
Cycloidal Toolpath Planning for Robotic Sandblasting
August 5, 2026
Today, Efecan and I attached the sandblasting device to the robotic arm. The device sprays a special sandblasting material onto surfaces using air pressure. Thus, it is used for cleaning moldy and dirty surfaces in buildings under restoration. Under normal conditions, the sandblasting gun is controlled manually. If the cleaning is too light, it remains insufficient, but it shouldn’t be so intense as to erode the stone either. Normally, the operator performs this control visually. Here, the potential uses for…