Rhino+Gh: Grasshopper for Beginners (7)
by Tuğrul Yazar | February 2, 2023 11:48
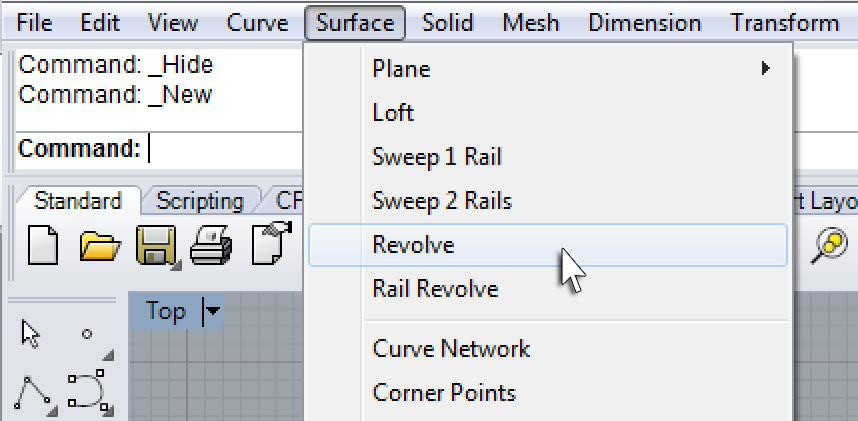
We continue with the Grasshopper for Beginners series[1] by explaining Rhino+Gh workflow principles. What does GH add to Rhino[2]‘s standard drawing and modeling functions? To put the question differently, what does GH do that conventional modeling programs, such as Rhino, can’t? What is the difference and relationship between Rhino+Gh? Let’s take an example to answer these questions. Our example is about parametrically describing a surface model and deriving its alternatives. First, we will try to create a surface using only Rhino commands. Therefore, turn off GH for a short time and focus on the Rhino screen. We want to create a surface in the form of a glass or a vase. To do this, we will use the Revolve command under Rhino’s Surface menu.
After running the command, we are expected to answer some questions in order to create the surface. As we mentioned earlier, the sequential question-and-answer method on the command line will be familiar to AutoCAD users. The requirements to perform the revolve operation are a profile curve, an axis of rotation, and an angle of rotation, respectively. This means that we must have drawn a profile curve beforehand in order to perform the operation. Let’s create this desired profile curve before exiting the Revolve command with the Esc key on the keyboard. We need to draw a profile curve in the Front View, that is, in the front view, using the Line command.
To quickly switch between different views such as top, front, and perspective on the Rhino screen, you can press F1, F2, F3, and F4 while pressing the CTRL key on the keyboard, or you can navigate through the existing images with the CTRL + Tab key.
Profile Curve
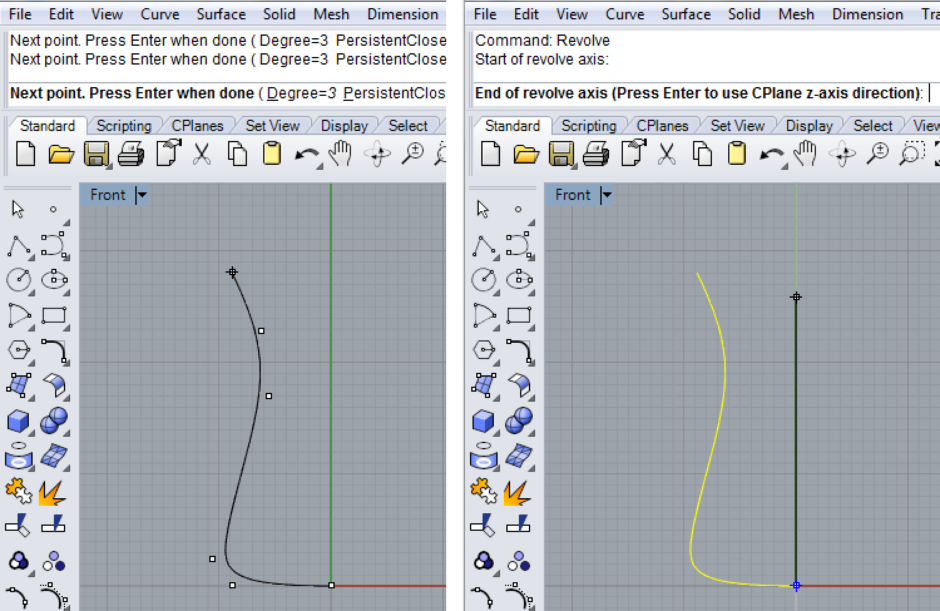
At these stages, you can try your AutoCAD knowledge, for example, Object Snap (osnap) with F3 on the keyboard, and orthogonal drawing (Ortho) with F8. We can create the curve by placing the points and pressing enter from the keyboard. When the profile curve is ready, we can call the Revolve command again. Let’s mark the curve we just drew and press Enter on the question it asks as the first input. Let’s give the axis of rotation by drawing a straight line and enter the starting angle and rotation angle as 0 and 360 and press Enter.
If things don’t go the way you want, you can exit the Rhino command with Esc on the keyboard. You can undo it by pressing the letter U and Enter and undo the last operation. The CTRL+Z combination will do the same.
Revolve Surface
The figure above shows the drawing of the profile curve and entering the desired rotational axis on the Rhino screen while creating the surface. The figure below shows the result of the Revolve process. Try to follow the steps described above until you get a similar result.
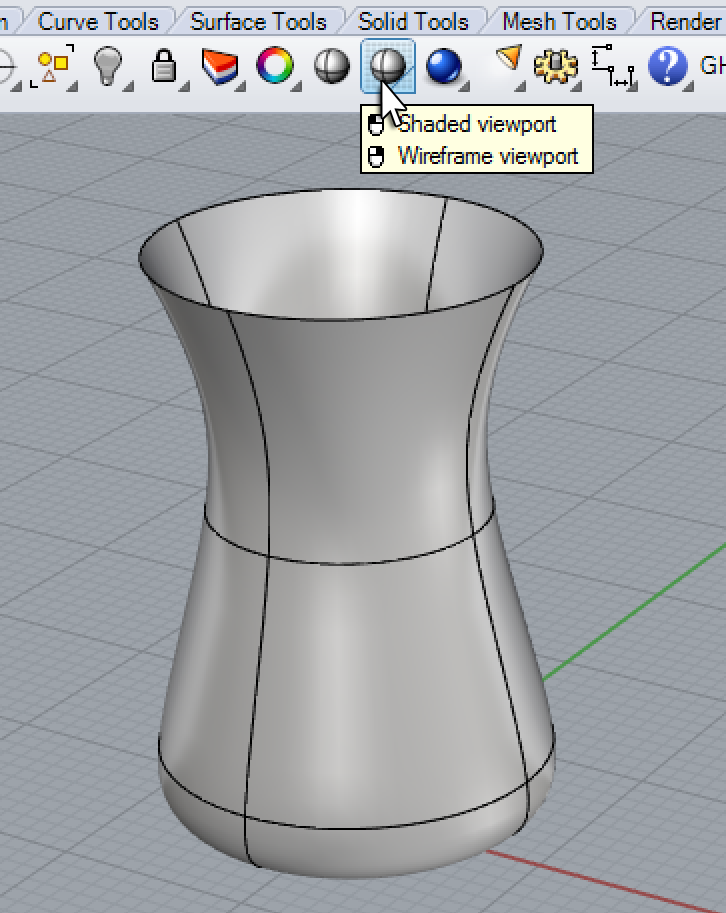
In Rhino’s perspective view, you can rotate the image by holding down the right mouse button (RotateView). You can also zoom in and out with the middle wheel, and pan the image by holding down the right button with Shift.
Conclusion for Rhino+Gh Introduction
This is it for now. You can see that the modeling process in Rhino requires a step-by-step execution of commands and inputs. In the next episode of Rhino+Gh, we are going to translate and repeat the same process in Grasshopper.
- Grasshopper for Beginners series: https://www.designcoding.net/category/tools-and-languages/grasshopper/
- Rhino: https://www.rhino3d.com/
Source URL: https://www.designcoding.net/rhinogh-grasshopper-for-beginners-7/