Shear Magic
by Tuğrul Yazar | March 7, 2015 02:14
This video is dedicated to Design Computing[1] and Basic Design[2] students, who “contour” and then move each section by hand in Rhino[3]. They do it individually to fabricate their laser-cut homework from cardboard. It could also be a macro but I prefer this. Because it does not work in all conditions. Maybe you should orient your contouring results similar to those shown in the video, and then use the shear command to spread them. I called this method “shear magic”. Let’s watch it below:
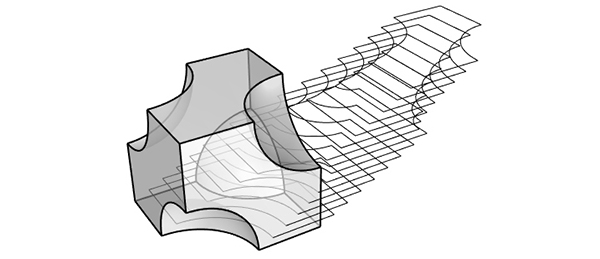
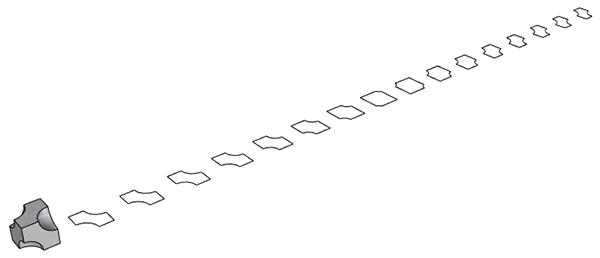
You can see an example of the process above. First, we create the contour curves by using the Contour command of Rhino. You can define the contour plane, direction, and the distance between the contours as the options of this command. Then, we jump to any side view. You can hit CTRL+F2 to do this quickly. After that, while the contour curves are still selected, we run the “Shear” command. We set the “Rigid” option to “Yes”. Then, I choose any bottom corner of the shape as the origin point. While you drag the mouse, you will see that the curves will spread.
Although this may deform the curves, it looks like it is not deforming them due to the Rigid=Yes option. After you have enough space between the curves, still selected, run the “ProjectToCplane” command, type “y” into the delete option, and hit enter. You will see that you separated and aligned the curves to Z=0.
I hope this “shear magic” method is useful in some cases. It is possible to develop Python and Grasshopper scripts to automate this task.
- Design Computing: https://www.designcoding.net/category/education/design-geometry/
- Basic Design: https://www.designcoding.net/category/education/basic-design/
- Rhino: https://www.rhino3d.com/
Source URL: https://www.designcoding.net/shear-magic/